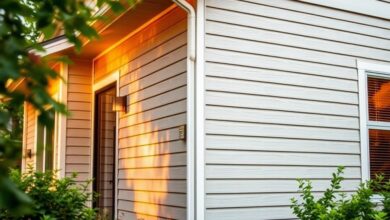
Adding insulated siding to your home can make it more energy-efficient, durable, and look better. This guide will help you through the DIY insulated siding process. You’ll get a professional finish.
This step-by-step guide will make you confident in your project. You’ll enjoy a quieter, more durable home. We’ll cover the key parts of the installation, so you know what to do.


Key Takeaways
- Understand the benefits of insulated siding for your home.
- Learn the step-by-step process for a successful DIY installation.
- Discover how to achieve a professional-looking finish.
- Enhance your home’s energy efficiency and durability.
- Reduce noise and improve overall comfort.
Understanding Insulated Siding Benefits
Insulated siding brings many benefits, like better energy use, less noise, and longer-lasting homes. These perks make it a great choice for those wanting to improve their home’s exterior.
Energy Efficiency Advantages
Insulated siding helps cut down on energy use. It adds an extra layer of insulation. This means less heat loss in winter and less heat gain in summer. Homeowners can save a lot on their energy bills.
Noise Reduction Properties
It also blocks outside noise, making homes quieter. This is great for homes in noisy areas or near busy roads.
Improved Home Durability
Insulated siding boosts a home’s durability too. It protects against wind, rain, and extreme temperatures. This keeps the home safe and strong.
| Benefits | Description | Advantages |
|---|---|---|
| Energy Efficiency | Reduces heat loss and gain | Lowers energy bills |
| Noise Reduction | Acts as a sound barrier | Creates a quieter living space |
| Home Durability | Protects against the elements | Extends the life of the siding |
Essential Tools and Materials for the Job
To make sure your installation goes smoothly, you need the right tools and materials. Having them ready will save you time and money. It also ensures your work looks professional.
Required Tools Checklist
- Utility knife for cutting siding panels
- Hammer for tapping siding into place
- Tape measure for measuring walls and panels
- Level to ensure straight installation
- Pencil and chalk line for marking panels and walls
Materials Shopping List
Here’s what you’ll need for the project:
- Insulated siding panels
- Flashing for corners and edges
- Nails or other recommended fasteners
- J-channel for around windows and doors
Safety Equipment Recommendations
Remember to get your safety gear ready:
- Gloves to protect your hands
- Safety glasses to protect your eyes
- A dust mask to avoid inhaling debris
Preparing Your Home for Insulated Siding
Getting your home ready for insulated siding is key. It involves several important steps. These steps make the installation smooth and effective.
Removing Existing Siding
The first step is removing the existing siding. This lets you check the structure and fix any issues. Be careful not to harm the sheathing or features like windows and doors.
Wall Inspection and Repairs
After removing the old siding, do a detailed wall inspection. Look for damage, rot, or water signs. Fix any problems before installing new siding. This ensures a strong base for your new siding.
Moisture Barrier Installation
Installing a moisture barrier is vital. It keeps water out and protects your siding. Make sure it’s aligned right and fastened well to the sheathing.
- Check the barrier for any tears or gaps.
- Seal any seams or joints with the right sealant.
- Make sure it’s correctly installed around windows and doors.
By following these steps, you’ll be ready for a successful insulated siding installation. It will make your home more energy-efficient and durable.
How to Install Insulated Siding: Step-by-Step Process
For a successful insulated siding installation, knowing the steps is key. Make sure you have all your tools and materials ready before starting.
Starting Corner Installation
Start by putting up the starter strip or the first row of siding at the wall’s bottom. This gives a base for the first row. For corners, use a corner post or starter strip, based on your siding type.
Panel Measurement and Cutting Techniques
Measure each panel carefully for a perfect fit. Cut the siding with a circular saw or utility knife. Always wear protective gear when cutting.
- Measure the wall’s width to figure out how many panels you need.
- Cut panels to fit around windows, doors, and other obstacles.
- Use a miter saw for precise angled cuts.
Proper Nailing Methods
Nailing is a key part of siding nailing. Make sure nails go into the center of the nailing strip. Avoid over-driving, which can harm the siding.
Nail Spacing Guidelines
Keep nail spacing even for proper siding security. Nails should be about 12-16 inches apart.
Preventing Over-Driving Nails
To avoid over-driving nails, use a nail gun with depth adjustment. This keeps the nail head flush with the siding, securing it without damage.
By following these steps and focusing on panel measurement and nailing, you can get a professional insulated siding installation. It will boost your home’s energy efficiency and look.
Working Around Windows and Doors
Installing insulated siding around windows and doors is a challenge. It needs precision and care for a tight seal and a clean look.
J-Channel Installation
The J-channel is key for framing windows and doors. First, measure the frame’s width. Cut the J-channel to fit, leaving room for expansion. Use corrosion-resistant nails to secure it, making sure it’s level and straight.
Cutting and Fitting Panels Around Openings
When cutting panels for windows and doors, be precise. Use a circular saw or jigsaw for clean cuts. Measure carefully, considering the J-channel overlap. Test the panel fit before securing it for a tight seal.
Sealing Techniques for Weather Protection
Sealing windows and doors is vital for keeping out the weather. Apply a high-quality sealant where the J-channel meets the siding. Fill all gaps to block water. Check these spots often to keep the seal strong.
| Technique | Purpose | Best Practice |
|---|---|---|
| J-Channel Installation | Frames windows and doors | Use corrosion-resistant nails |
| Cutting Panels | Fits siding around openings | Measure twice, cut once |
| Sealing | Prevents water infiltration | Use high-quality sealant |
Mastering these steps will give your home a professional look and keep it weatherproof.
Installing Insulated Siding in Challenging Areas
Installing insulated siding in tricky spots is key. These spots, like corners, gables, and where utilities go through, need special care. This ensures a job well done and a lasting finish.
Handling Corners and Edges
Measuring and cutting siding for corners and edges is critical. A miter saw helps make clean cuts. Adding a weather-resistant barrier seals everything tight.
Working with Gables and Eaves
Gables and eaves are tricky because of their angles. Use a combination square to get the right angle for cutting. A utility knife or jigsaw makes the cuts needed.

Navigating Utility Penetrations
Utility spots, like vents and outlets, need careful planning. Use a template or stencil to mark where to cut. Then, use a jigsaw or coping saw to cut out the area.
| Challenging Area | Technique | Tools Required |
|---|---|---|
| Corners and Edges | Precise measurement and cutting | Miter saw, weather-resistant barrier |
| Gables and Eaves | Angled cutting | Combination square, utility knife or jigsaw |
| Utility Penetrations | Templating and precise cutting | Template or stencil, jigsaw or coping saw |
Troubleshooting Common Installation Problems
Even with careful planning, problems can pop up during insulated siding installation. Knowing how to tackle common issues can save time and ensure a job well done.
Fixing Buckling and Warping
Buckling and warping happen if siding isn’t aligned right or if it faces extreme temperatures. To fix buckling, make sure the siding lines up with the starter strip and isn’t too tight. For warping, check that the siding is securely attached to the wall and there are no gaps.
Addressing Moisture Issues
Moisture can sneak behind the siding if it’s not sealed right or if there are gaps around windows and doors. To fix this, look for any gaps or cracks and seal them up. Also, check that the flashing around windows and doors is in place and not damaged.
Repairing Damaged Panels
Damage to a panel during installation can usually be fixed or replaced. For small cracks, a repair compound works well. But for bigger damage, you might need to swap out the panel. Make sure any new panels match the existing siding in material, color, and style.
Conclusion
Now that you’ve learned how to install insulated siding, you’re ready to start your DIY project. Insulated siding makes your home more energy-efficient, quieter, and more durable. It also increases your home’s value and comfort.
For a successful DIY project, you need to prepare well, measure accurately, and pay attention to details. This guide will help you do just that. You’ll get a professional-looking finish and enjoy all the benefits of insulated siding.
Once your project is done, you’ll save on energy costs and have a more comfortable home. You’ve got this! With this guide, you’re on your way to a successful DIY installation. You’ll be proud of your home’s new look and improved function.