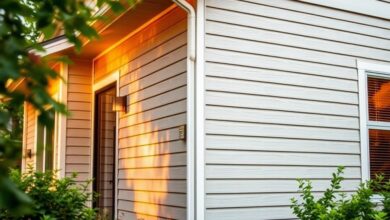
Upgrading your home’s exterior with insulated siding can make it more energy efficient and look better. Choosing the right siding is key.
Insulated siding boosts your home’s look and protects it from the weather. With the right tools and materials, you can get great results.


This guide will show you how to install long lasting insulated siding. We’ll cover everything from its benefits to the installation steps.
Key Takeaways
- Understand the benefits of insulated siding for your home.
- Learn how to choose the right materials for the job.
- Discover the steps involved in installing insulated siding.
- Improve your home’s energy efficiency and appearance.
- Achieve professional-looking results with the right tools.
Understanding the Benefits of Insulated Siding
Insulated siding is a big win for homeowners wanting to make their homes more energy efficient and cozy. It adds an insulation layer, cutting down on heat transfer between inside and outside.
Energy Efficiency and R-Value Explained
The R-Value shows how well insulated siding keeps your home warm in winter and cool in summer. A higher R-Value means better insulation, which lowers energy bills and makes your home more comfortable. For example, siding with an R-Value of 3.5 or higher can greatly cut down on winter heat loss.
Noise Reduction and Impact Resistance
Insulated siding also cuts down on noise, making your home quieter. Plus, it’s built to last, standing up to weather and reducing damage from extreme weather.
In short, insulated siding is a smart choice for homeowners. It boosts comfort, cuts energy costs, and adds durability to your home.
Tools and Materials Needed for Installation
For a successful insulated siding installation, having the right installation tools and siding materials is key. Before you start, make sure you have everything you need. This will help avoid delays and make the installation smooth.
Essential Tools for the Job
The right tools are essential for a quick installation. You’ll need a circular saw for cutting panels, a drill for attaching them, and a level for alignment. Also, a tape measure and chalk line are vital for precise measurements and markings.
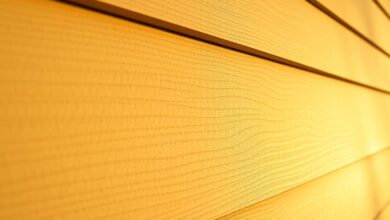
Required Materials and Quantities
To figure out the material quantities needed, measure your home’s surface area for siding. Calculate the length and width of each wall, minus windows and doors. Remember to add extra for cuts and waste. You’ll need insulated siding panels, starter strips, corner posts, and fasteners.
Preparing Your Home for Installation
Getting your home ready is key for a successful insulated siding job. Before starting, make sure your home is prepared well. This will help the installation go smoothly and efficiently.
Removing Old Siding Safely
Begin by safely removing the old siding. Use the right tools to avoid damaging the wall. Always wear gloves and safety glasses to protect yourself from sharp edges and debris.
Also, check for hazardous materials like asbestos or lead paint. If you find any, it’s best to hire a professional for removal.
Inspecting and Repairing the Wall Surface
After removing the old siding, inspect the wall surface for damage or rot. Look for water damage, mold, or structural weaknesses. Fix any issues to have a solid base for your new siding.
Replace any rotten wood and tighten loose areas. This will make the surface stable.
Installing House Wrap and Flashing
Then, install house wrap for extra protection against the weather. Make sure it’s sealed around windows, doors, and openings. Use flashing to keep water out around these spots.
House wrap and flashing are vital for a watertight seal. They help your insulated siding last longer.
Step-by-Step Installation of Long Lasting Insulated Siding
Now that your home’s exterior is ready, it’s time to start installing the siding. This process has several important steps. These steps help ensure your siding is installed well and lasts a long time.
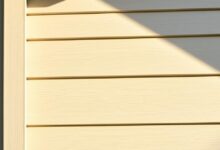
Installing Starter Strips and Corner Posts
The first step is to put in starter strips and corner posts. These provide a base for the siding panels. Starter strips go along the bottom of the wall for a straight line. Corner posts cover the corners for a clean look. It’s very important to align them correctly to avoid problems later.
Measuring and Cutting Siding Panels
Measuring and cutting the siding panels accurately is key. Measure each section of the wall, including around windows and doors. Use a sharp knife or circular saw to cut the panels. Always double-check your measurements to avoid waste and ensure a good fit.
| Panel Length | Cutting Tool | Installation Tip |
|---|---|---|
| Up to 12 feet | Utility Knife | Score and snap for clean cut |
| Over 12 feet | Circular Saw | Use a guide for straight cut |
Properly Securing Panels to the Wall
Securing the siding panels involves using the right fasteners and method. Use nails or screws that won’t damage the wall but are long enough to hold the siding. Follow the manufacturer’s instructions for spacing fasteners to ensure the panels are securely attached.
“Properly securing siding panels is key for withstanding weather and ensuring siding lasts long.”
Working Around Windows, Doors, and Fixtures
Installing siding around windows, doors, and fixtures can be tricky. Use J-channels to seal these areas. Measure and cut the siding carefully to fit around these features. Install flashing behind the siding and around these spots to keep water out.
By following these steps and focusing on details, you can get a professional-looking siding installation. This will improve your home’s energy efficiency and look.
Finishing Touches and Trim Work
Now that the insulated siding is mostly done, it’s time to add the final touches. These include J-Channels and decorative trim. They’re key for both looks and function.
Installing J-Channels and Decorative Trim
Putting J-Channels around windows and doors is vital. It gives a clean look and keeps these spots safe from the weather. Here’s how to do it right:
- Measure the length needed for each window and door opening.
- Cut the J-Channels to size with a miter saw or tin snips.
- Use nails to secure the J-Channels, making sure they’re level and straight.
After that, add decorative trim around the J-Channels. This can be vinyl or wood, and should match your siding.
Completing the Final Row and Soffit Areas
The last row of siding is as important as the first. It finishes off your home’s look. Here’s how to finish it:
- Measure and cut the final siding panels for the remaining space.
- Secure these panels tightly, making sure they fit well and are straight.
Don’t forget the soffit areas. They need finishing under the eaves. Use soffit panels, J-Channels, and fascia boards to secure them.
By paying attention to these details, your insulated siding will look great. It will also make your home more appealing from the outside.
Troubleshooting Common Installation Problems
Even with careful planning, installation issues can happen. But being ready can help a lot. When installing long-lasting insulated siding, you might face some common problems. With the right strategies, you can solve them easily.
Dealing with Uneven Walls and Surfaces
Uneven walls can be a big problem during installation. To fix this, use shims to level the siding panels. This makes sure they fit smoothly against the wall. Also, check the wall surface before starting and fix any issues to avoid more problems.
Fixing Improper Panel Alignment
Bad panel alignment can cause water leaks and lower energy efficiency. To solve this, double-check your measurements. Make sure the panels line up with starter strips and corner posts. A laser level can help you get it right.
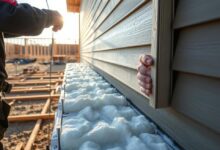
Addressing Weather-Related Challenges
Weather like strong winds, rain, or extreme temperatures can affect installation. To deal with this, postpone installation during bad weather. Or use coverings to protect the siding and materials from the weather.
Conclusion
Installing long lasting insulated siding is a big step to upgrade your home’s look and feel. It makes your home more energy efficient, comfortable, and attractive. By following this guide, you now know how to install it, from start to finish.
A good installation means careful planning and precise work. You’ve learned how to prepare your home. This includes removing old siding, fixing walls, and adding house wrap and flashing.
Now, your home looks great and will stay that way for a long time. This upgrade not only makes your home look better. It also saves energy and makes your home more comfortable.